Pages

Tuesday, March 2, 2010

BEAUTIFUL EXAMPLES OF ACTION SEQUENCE PHOTOGRAPHY


When you’re creating a sequence photo make sure you get all the action you need. This can be done by choosing shooting a moving. Make sure you have a camera that able to do high shutter speeds. A DSLR that can shoot 3-5fps can get you great results. Then set the camera up on a sturdy tripod so displacement between frames. Then determine the exposure and multiply by the quantity of frames you are going to shoot. Another way would be to quickly shoot a series of separate frames and merged them all together later with the help of photoshop. Below are some truly amazing examples of sequence photography.

Sunday, February 14, 2010

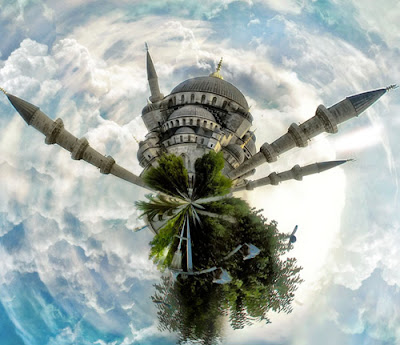
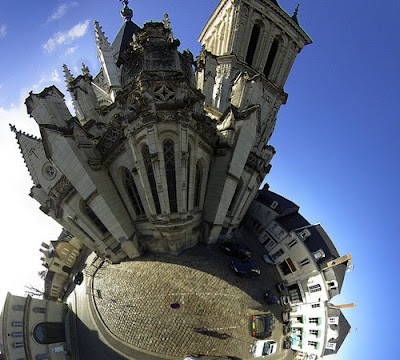
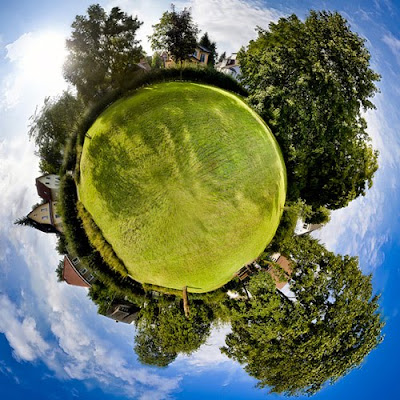
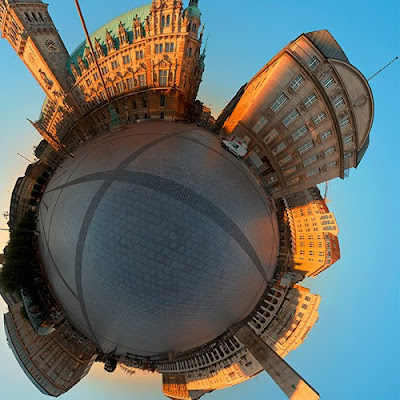
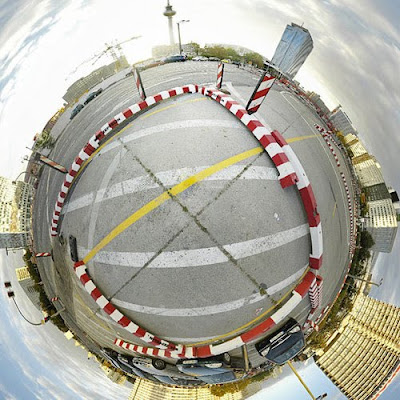
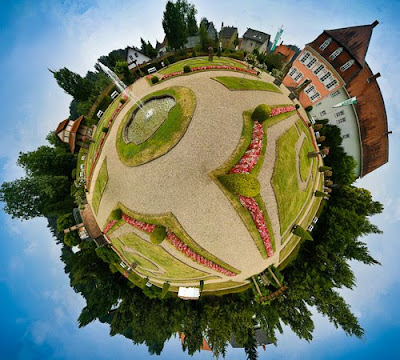
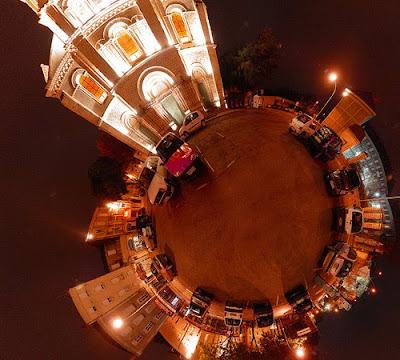
How to Create Your Own Planets Using Your Panoramas


We don’t know about you, but ever since those astronomers kicked Pluto out of the party, we’ve been feeling mighty lonely over here on planet Earth.

But wait! We’ve just the solution: Our pal Dirk wrote up a tutorial that shows you how to turn any panorama or landscape photograph into a full-fledged planet!

Best of all, once you’ve selected an image to work with, the process takes only 5 minutes. (Launching your new planet into solar orbit may take a bit longer.)
How to Create Your Own Planets with Your Panoramas
www.photojojo.com/content/tutorials/create-your-own-panorama-planets/

There are special moments in the life of any photographer that suddenly change his view of his hobby (or profession). For me, those moments included:

* Getting your analog SLR

* Discovering a software that could stitch together photos into a seamless panorama adobe photoshop cs3 or cs 4

* Discovering the rather simple instructions to create my own planet

To make a long story short: The “Polar Panorama Effect” is one of my favorite ways to process photos into unique pieces of art. It takes a panoramic (or landscape) photo and uses the Polar Coordinates filter of Photoshop CS or The Gimp to create a circular image that seems to wrap the panorama around a planet.


Looks cool, and it’s easy to do! Let’s get started.
Selecting a Source Photo for Your Planet

When selecting a photo to start with you should keep the following things in mind:

* Panoramas or landscapes cropped to have an aspect ratio at least 2:1 (the width should be at least two times the height) work best. Wider photos are better.

* The bottom area (bottom 25% or so) of your photo should have very little detail (e.g. sand, asphalt, water). This area will become the center of your planet and will be distorted the most.

* The upper area (upper 25%) of your photo should also be light on detail– preferably just one color (e.g. blue sky, night sky etc.)

* The left and the right edges of your photo should match, or come close to matching, each other. (Always the case for a stitched 360 degree panorama.)

* The horizon must be exactly horizontal. Since the left and right edges of your photo will be joined, if they are at different heights your planet will have a big crack in the surface. (Again, a non-issue for a properly executed 360 degree panorama.)

We’re going to go through two examples: the first uses a simple panorama, the second a landscape shot that we’ll crop before proceeding.
Starting Simple: Planet San Francisco

It’s simplest to work with a 360 degree panorama, so let’s start with this panorama shot of San Francisco taken from the Coit Tower:

168820033_9f33f26583.jpg
Step 1: Resize and Rotate

screenshot1_thumb.jpgThe first thing we need to do is prepare the image for the Polar filter. We do this by stretching the height of the image so that the image is a perfect square.

Select Image>Image Size from the menus. Uncheck ‘Constrain Proporties’ and set the “height” to the same value as your “width”. Next, rotate the image 180 degrees. (Image>Rotate Canvas>180)

You should end up with something like the image to the right.
Step 2: Apply the Polar Filter

Next, we’ll apply the Polar Filter to wrap our image into a sphere.

Choose Filter > Distort > Polar Coordinates from the menus and in the resulting dialog box, select the “Rectangular to Polar” setting.

(If you’re using The Gimp the command is Filters > Distorts > Polar Coords.)


Easy cheesy, right? Now for some finishing touches…
Step 3: Rotate and clean up

The rest is just a little digital darkroom work: Rotate the planet to your liking, adjust the contrast and colors, clean up the sky and the edges where the left and right border of the image came together. (The clone stamp and healing brush may be handy here.) That’s it, we’re done!

this article was produced by :photojojo
the images was produced by :www.hongkiat.com

Friday, February 12, 2010

WHAT IS HDR


In image processing, computer graphics, and photography, high dynamic range imaging (HDRI or just HDR) is a set of techniques that allow a greater dynamic range of luminances between the lightest and darkest areas of an image than standard digital imaging techniques or photographic methods. This wider dynamic range allows HDR images to more accurately represent the wide range of intensity levels found in real scenes, ranging from direct sunlight to faint starlight.[1]

The two main sources of HDR imagery are computer renderings and merging of multiple photographs, which in turn are known as low dynamic range (LDR)[2] (also called standard dynamic range (SDR)[3]) photographs.

Tone mapping techniques, which reduce overall contrast to facilitate display of HDR images on devices with lower dynamic range, can be applied to produce images with preserved or exaggerated local contrast for artistic effect.
In photography, dynamic range is measured in EV differences (known as stops) between the brightest and darkest parts of the image that show detail. An increase of one EV or one stop is a doubling of the amount of light.
Dynamic Ranges of Common Devices
Dynamic Ranges of Common Devices Device Stops Contrast
Computer LCD Display 9.5 700:1
DSLR camera (1Dmk2) 11[4] 2048:1
Print film 7[4] 128:1

High-dynamic-range photographs are generally achieved by capturing multiple standard photographs, often using exposure bracketing, and then merging them into an HDR image. Digital photographs are often encoded in a camera's raw image format, because 8 bit JPEG encoding clips the camera's possible dynamic range (and also introduces undesirable effects due to the lossy compression).

Any camera that allows manual over- or under-exposure of a photo can be used to create HDR images.

Some cameras have an auto exposure bracketing (AEB) feature with a far greater dynamic range than others, from the 3 EV of the Canon EOS 40D, to the 18 EV of the Canon EOS-1D Mark II.[5]

The Pentax K-7 DSLR has an HDR mode which captures an HDR image and then outputs (only) a tone-mapped JPEG file.[6]
Dynamic range for each ISO setting of the 1Dmk2[7] ISO Dynamic Range (Stops)
50 11.3
100 11.6
200 11.5
400 11.2
800 10.7
1600 9.7
3200 8.7
[edit] Mathematics

Contrast ratio = 2(EV difference)

EV difference = log2(Contrast ratio)

The fact that an increase of 1 EV indicates a doubling of light means that EV is often represented on a base-2 logarithmic scale.

The human perception of brightness is well approximated by a Steven's power law,[8] which over a reasonable range is close to logarithmic, as described by the Weber–Fechner law, which is one reason that logarithmic measures of light intensity are often used.[9][10]
[edit] Representing HDR images on LDR displays
[edit] Contrast reduction

HDR images can easily be represented on common LDR devices, such as computer monitors and photographic prints, by simply reducing the contrast, just as all image editing software is capable of doing.
[edit] Clipping and compressing dynamic range

Scenes with high dynamic ranges are often represented on LDR devices by cropping the dynamic range, cutting off the darkest and brightest details, or alternatively with an S conversion curve that compresses contrast progressively and more aggressively in the highlights and shadows while leaving the middle portions of the contrast range relatively unaffected.
An example of a rendering of an HDRI tone-mapped image in a New York City nighttime cityscape.
[edit] Tone mapping
Main article: Tone mapping

Tone mapping reduces the dynamic range, or contrast ratio, of the entire image, while retaining localized contrast (between neighboring pixels), tapping into research on how the human eye and visual cortex perceive a scene, trying to represent the whole dynamic range while retaining realistic color and contrast.

Images with too much tone mapping processing have their range over-compressed, creating a surreal low-dynamic-range rendering of a high-dynamic-range scene.
[edit] Comparison with traditional digital images

Information stored in high dynamic range images typically corresponds to the physical values of luminance or radiance that can be observed in the real world. This is different from traditional digital images, which represent colors that should appear on a monitor or a paper print. Therefore, HDR image formats are often called "scene-referred", in contrast to traditional digital images, which are "device-referred" or "output-referred". Furthermore, traditional images are usually encoded for the human visual system (maximizing the visual information stored in the fixed number of bits), which is usually called "gamma encoding" or "gamma correction". The values stored for HDR images are often gamma compressed (power law) or logarithmically encoded, or floating-point linear values, since fixed-point linear encodings are increasingly inefficient over higher dynamic ranges.[11][12][13]

HDR images often use a higher number of bits per color channel than traditional images to represent many more colors over a much wider dynamic range. 16-bit ("half precision") or 32-bit floating point numbers are often used to represent HDR pixels. However, when the appropriate transfer function is used, HDR pixels for some applications can be represented with as few as 10–12 bits for luminance and 8 bits for chrominance without introducing any visible quantization artifacts.[11][14]
[edit] History of HDR photography
[edit] 1850

The idea of using several exposures to fix a too-extreme range of luminance was pioneered as early as the 1850s by Gustave Le Gray to render seascapes showing both the sky and the sea. Such rendering was impossible at the time using standard techniques, the luminosity range being too extreme. Le Gray used one negative for the sky, and another one with a longer exposure for the sea, and combined the two in a single picture in positive.[15]
[edit] 1930

High dynamic range imaging was originally developed in the 1930s and 1940s by Charles Wyckoff. Wyckoff's detailed pictures of nuclear explosions appeared on the cover of Life magazine in the mid 1940s. Wyckoff implemented local neighborhood tone remapping to combine differently exposed film layers into one single image of greater dynamic range.
[edit] 1980

The desirability of HDR has been recognized for decades, but its wider usage was, until quite recently, precluded by the limitations imposed by the available computer processing power. Probably the first practical application of HDRI was by the movie industry in late 1980s and, in 1985, Gregory Ward created the Radiance RGBE image file format which was the first (and still the most commonly used) HDR imaging file format.

Wyckoff's concept of neighborhood tone mapping was applied to video cameras by a group from the Technion in Israel led by Prof. Y.Y.Zeevi who filed for a patent on this concept in 1988.[16] In 1993 the first commercial medical camera was introduced that performed real time capturing of multiple images with different exposures, and producing an HDR video image.[17]

Modern HDR imaging uses a completely different approach, based on making a high-dynamic range luminance or light map using only global image operations (across the entire image), and then tone mapping this result. Global HDR was first introduced in 1993[18] resulting in a mathematical theory of differently exposed pictures of the same subject matter that was published in 1995 by Steve Mann and Rosalind Picard.[19] In 1997 this global-HDR technique of combining several differently exposed images to produce a single HDR image was presented to the computer graphics community by Paul Debevec.

This method was developed to produce a high dynamic range image from a set of photographs taken with a range of exposures. With the rising popularity of digital cameras and easy-to-use desktop software, the term HDR is now popularly used to refer to this process. This composite technique is different from (and may be of lesser or greater quality than) the production of an image from a single exposure of a sensor that has a native high dynamic range. Tone mapping is also used to display HDR images on devices with a low native dynamic range, such as a computer screen.
[edit] 1996

Steve Mann developed and patented the global-HDR method for producing digital images having extended dynamic range at the MIT Media Laboratory.[20] Mann's method involved a two-step procedure: (1) generate a single floating point image array by global-only image operations (operations that affect all pixels identically, without regard to their local neighborhoods); and then (2) convert this image array, using local neighborhood processing (tone-remapping, etc.), into an HDR image. The image array generated by the first step of Mann's process is called a "lightspace image", "lightspace picture", or "radiance map". Another benefit of global-HDR imaging is that it provides access to the intermediate light or radiance map, which has been used for computer vision, and other image processing operations[20].
[edit] 1997

In 1997 this technique of combining several differently exposed images to produce a single HDR image was presented to the public by Paul Debevec.
[edit] 2005
A tone-mapped rendering of an HDR photo taken in Ithaca, New York

Photoshop CS2 introduced the Merge to HDR function.[21]

In many ways, Photoshop CS2's HDR function is the holy grail of dynamic range. With properly shot and processed files it allows photographers to easily create images that were previously impossible, or at least very difficult to accomplish. But, good as it is, like a gun or nuclear power, it can be a force for evil as well as good.

Not every image needs to have 10-15 stops of dynamic range. In fact, most photographs look quite nice, thank you very much, with the 5-7 stops of dynamic range that we're used to. I fully expect to see some really silly if not downright ugly images in the months ahead, as photographers get their copies of Photoshop CS2 and start discovering what the HDR function is capable of.

But, as with all such tool [sic], in the hands of sensitive artists and competent craftsmen, I'm sure that we will start to be shown the world in new and exciting ways.

– Michael Reichmann , Luminous Landscape[

WHAT IS SHUTTER SPEED

What is shutter speed ? The aperture diaphragm of a lens (bigger or smaller values) AND timing (open and close) of the camera's shutter curtain - BOTH perform the tasks of regulating the amount of light entering the camera and expose onto the film. The shutter speed scales engraved on the shutter speed dial of conventional camera bodies with a shutter speed ring OR via some flickering digital numerals on the LCD screen like: 1/8000, 1/4000, 1/1000, 1/500, 1/250, 1/125, 1/60, 1/30, 1/15, 1/8, 1/4, 1/2, 1 or -1, -2 etc. are essentially indicators of the duration (timing) at which the shutter curtain opens up and closes during an exposure process. A 1/125 setting means the shutter curtain open and close within one hundred and twenty five of a second while 1 means an one full-second the shutter opens up during exposure to absorb the available light source onto the film to form an exposure.
Dial.jpg Illus.jpg
The shutter speed dial provide the selection of shutter speeds, and indicates the timing of the shutter open and closes. A fast shutter speed such as 1/500 sec will close faster than, say 1/2 sec exposure time. In this case, the shutter curtain will close very fast and thus resulting in less light entering the film. Illustration used here is a older horizontal shutter design, more info is available by < clicking here >.

Nikon FE.jpg CanonA1.jpg
Most conventional SLRs have a shutter speed dial (or ring) on the top panel of the camera body to adjust shutter speed. But it evolves with the development of modern electronic SLRs.

Before the advent of LCD, multi-modes electronic SLRs such as Canon A-1 has a dual input dial for shutter speed (B) and aperture control (Green). But again it depends a lot on camera design. For an instance, ALL Olympus and mechanical Nikkormat SLRs have their shutter speed scales located just next to the lens mount, you have to make use of a grip designed to turn the scales (A) !

OM scales.jpg PentaxME Super.jpg Again, NOT all SLR cameras have shutter speed selected visible from the top or the front, instead, changes and selection can only be viewed inside the viewfinder. A good example is this Pentax push button that controls (C) the shutter speed.

But ALL these may not be applicable to a new wave of modern AF SLRs which use a different kind of input to control shutter speed in the camera. Most would have use thumb or finger wheel(s) such as illustrated earlier on the aperture control section. Well, it is hard to cover and satisfy everybody's desire all in a single page, and my prime interest is still to selling you the idea of how to make use of an old, cheap manual focus SLR of yesteryears. As for an modern AF SLRs, there are plenty of useful resource sites on the Net for you to browse through and gather such information. At this moment in time, I won't be able to offer too much of a help here in this site. But whatever it is, basic principle remains.

What does shutter speeds do ?

In principle, shutter speeds, like aperture value detailed on earlier section, contributing as the next half of the main components for any exposure process - the interval at which the shutter opens to allow a specific amount of light (also depends on the opening of the lens diaphragm) to pass through and expose the film inside..

Different selection of shutter speeds will yield different kind of visual effect on a final photograph. Generally, a fast shutter speed can freeze action while slow speed can blur your image. I am not indicating these are fixed rules. If you understand the nature of how various shutter speed(s) will affect an exposure, you may put them to creative use to enhance the effect - like other than freezing a fast action scene, a slow shutter speed can also put to good use in portraying movement. You can try on to "PAN" a moving subject by following its direction or simply generates a sense flow of movement. But MOST people relates SLOW means BLURRING AN IMAGE which leave little for them to select this alternative to try them out. Well, it is excusable because in most PR-type of photography (photo session on public relation matters like wedding, gathering, seminars, or personal domestic duties for some privileged group - includes your wife, mistress or girl friends..), who would appreciate a defocus or blurry images ? BUT - for the creative minded photographer, slower shutter speed sometimes may create a more powerful visual impact than images taken with action-freeze high shutter speed(s), say, a free flowing river, traffic, a flock of birds taking off or even speed-demons on a race track.. etc..

Nikon F2s.jpg

A basic mechanical SLR camera body like the Nikon F2S of the mid-seventies only offers manual exposure control. AE may require accessory such as DS-1 to transform it into an shutter priority AE camera.

A camera operating in manual mode or a mechanical camera requires you to set the shutter speed and aperture value on the lens manually. In an automatic camera, there is usually at least one type of automatic exposure mode is available. Because of complication of mechanism involves, most camera manufacturers offer only Aperture Priority AE or Programmed AE modes on their EARLY electronic camera models. A good example is Minolta and Canon with their MD and FD mount cameras and lenses while in some exceptional case, such automation was made possible using a mechanical device such as Nikon's F2 with their EE Aperture Control Unit.

However, by early '80 with development and refinement made on both cameras and lenses (Most would require a new series of optics), majority of them started to offer "Shutter Priority AE" and "Intelligent Programmed AE" as well.

OFF-TOPIC SUPPLEMENTS: "Shutter Speed Priority AE": An exposure mode with an automatic or autofocus camera that lets you select the desired shutter speed; the camera will then set the matching aperture value for a proper exposure. If you change the shutter speed, or the light level changes, the camera adjusts the aperture accordingly "Aperture Priority AE": An exposure mode on an automatic or autofocus camera that lets you set the aperture while the camera sets the shutter speed for a proper exposure. If you change the aperture, or the light level changes, the shutter speed will change automatically. Apart from the sport or action photography, aperture priority is the most common & effective automatic mode used in photography. It can also explained as: An automatic exposure process in which the lens aperture is set by the photographer, and the camera sets the shutter speed. It can also be used in the stopped-down mode with any lens that does not interfere with the metering system e.g. bellow unit or non-auto extension rings etc. "Programmed AE": An exposure mode on an automatic or autofocus camera that automatically sets BOTH aperture and shutter speed for a proper exposure. "Intelligent / Flexi-Programmed (flexible-Programmed Auto) AE": The camera's electronic circuit will de


Thursday, February 11, 2010

WHAT IS AN APERTURE

Aperture is referred to the lens diaphragm opening inside a photographic lens. The size of the diaphragm opening in a camera lens REGULATES amount of light passes through onto the film inside the camera the moment when the shutter curtain in camera opens during an exposure process. The size of an aperture in a lens can either be a fixed or the most popular form in an adjustable type (like an SLR camera). Aperture size is usually calibrated in f-numbers or f-stops. i.e. those little numbers engraved on the lens barrel like f22 (f/22),16 (f/16), f/11, f/8.0, f/5.6, f/4.0, f/2.8, f/2.0, f/1.8 etc. Each of this value represents one time the amount of light either more or less in quantity. Meaning to say, f/16 will let in 1X the amount of light than a diaphragm opening of f/22 and so forth; while on the other hand, an aperture of f/4.0 will let in 1X lesser than that of f/2.8 etc.

LENS SIDE:- If a simple word "diaphram" can be confusing to you, just try to think numbers engraved on the lens barrel are NOT referred to aperture diaphragm BUT rather, there are just number to let you refer the size of the lens diaphragm. So, if you are new to this, just memorize these numeric settings that will do, as they represent the corresponding size of the lens diaphram inside the lens and let you determine and control how much light you would require to let into the camera for a proper exposure by way of selecting an appropriate aperture diaphragm from large to small (lens opening). But technically, these numbers refer to the relative physical opening of the lens diaphragm. So, don't worry about the confusing part of them.

NOTE:- When you are one level up:- *.. These numbers are very significant to the lenses because they are calculated based on the properties of the lens they're on. f/5.6 on a wide angle lens will not have the same diameter as another, say on a long lens. There are simple lens formulas which help calculate the different properties. But the f number diameter is unique to each lens..". Benoit Aubry (benoit_aubry@hotmail.com but I would rather teach a new budding photographer whio may be interested in picking some pieces rather than serving technical request of a more seasoned photographer. But ant=yway, thanks, pal.

Modern Autofocus SLR cameras may have a different ways in manipulating the aperture. One of the trend is - the aperture value is now control via a thumb wheel on the camera (usually near the shutter release button) and the AF lens has no aperture ring to alter the value. Each camera manufacturer usually has their own series of lenses under a trade name to verify its usage, various compatibility issues with their previous camera model's function etc. For an instance, Canon manual focus lenses are called "FD" or "FL"; while their newer series of autofocus lenses (AF) designed for their Canon EOS Series cameras are referred as "EF" (Electro Focus). Each of these MF/AF lenses has their own respective way to illustrate the control of aperture in the camera. When you turn the aperture ring on a lens to vary the aperture, you will be able to check visually the set opening of the lens diaphragm (Opens bigger or stopping smaller). * here in this section, I am confining the discussion within the MANUAL FOCUS lenses ONLY because the proportion of used equipment forms the basis for a cheap, easy entry for potential new serious photographers.
Remember: For a theoretical "perfect" exposure to be formed i.e. nice colour balance, every details shown or simply a photo that you are happy about, take a good combination between using an aperture with the appropriate matching shutter speed for any given film speed (ASA/ISO) are required. The latter refers to the film speed of the film roll used. i.e. ASA 100, ASA 200, ASA 400 etc. the faster the film speed used, you can use to capture lower lighting situation but at the expense of grainer output of prints / slides. Next, a little confusion may create for you to learn here: - each step increment in the use of film speed will also indirectly correspond with one step of aperture OR shutter speed.
I know you must be asking a mind boggling question while you read until here: Ooi....HOW THE HELL WOULD I KNOW WHAT APERTURE TO SET on my lens when I take a picture ? Frankly, you need not have to ! Inside any modern camera, there is a metering cell residing internally which measures the light intensity of the scene you are trying to capture/pointing to. Its metering circuitry will SUGGEST an exposure for you. For an instance, the exposure suggests by the camera's internal metering circuitry indicates 1/125 sec. (camera) with f/8.0 (lens) will deliver a decent exposure for your intended capture. You can override the camera setting (depends on whether the camera has such option for you to manipulate the aperture on the lens OR shutter speed on the camera, most P&S don't offer such options but a SLR camera usually does). For an example, change the f/8.0 to f/4.0 (let in more light by 2 steps 4.0-->5.6-->8.0) and compensate the shutter speed by few stops by limiting light entering the camera shutter i.e. 1/125--->1/250--->1/500. The compensated 2 steps on the shutter speed still delivers the SAME EXPOSURE as the earlier camera suggested reading. The difference is now with a f/4.0, you can achieve a narrow Depth of Field (refer to below WHY and WHAT difference it will bring to your picture with such alternation)..

However, the MOST confusing part for any new photographer is: Just remember in photographic term: a BIG aperture is actually referring to a smaller number engraved on the aperture ring of the lens i.e. f/1.4, f/2, f/2.8, f/4.0 etc. while small apertures mean bigger numbers i.e. f/22, f/16, f/11, f/8 etc. Once you have "overcome" such "mental block" in calculation, it should help you greatly understand / enjoy reading more in other sections that follow. So, it is important that you OUGHT to digest this paragraph. (CLICK HERE to understand the relation of those numbers found on the lens where how the lens diaphragm inside at each aperture set. Well, I am not sure who was the hell was the bloody smart guy who first started by inverting the number on the aperture on the lens - where small number (f/2.0, f/2.8 etc.) is actually referring to a larger lens opening while big number(s) such as f/11, f/16, f/22 etc. is actually smaller aperture. Basically, large aperture (f/2.0, f/2.8 etc.) lets in more light to the camera shutter for an exposure, while small aperture (f/11, f/16, f/22 etc.) has a smaller opening in the lens diaphragm to let in LESS light for a given exposure. The confusion usually causes a beginner who might be poor in mathematics gives up serious photography from here @#$^*#&*!!. Well, I guess you are not within that figures-fophia group, so - why don't just be patience and spends a few minutes to DIGEST this part. Trust me, it worth the time and could reward you with plenty of joy with the camera you own.

About aperture and its direct relation that might affect in your photography:- i.e. Other than controlling the amount of light entering into the camera, What else does "apertures" do ?

When the shutter button is released, light passes through the aperture diaphragm and hit the film, an exposure is formed. Basically, aperture, along with duration/timing of the shutter curtain opening, BOTH contribute to a the formation of an exposure. But aperture also affects an important photographic element called "depth of field" (short form "DOF"). You may ask, what is hell is this "Depth of Field" ? Depth of field is just technical term used to describe the 'zone' of sharpness' between nearest and furthest of a subject in focus (to be more exact, distance of sharp focus in front and behind, subject on which the lens is focused).

There are a few elements that will affects Depth of Field in a picture
(
Note:- Factors on lens ONLY, shutter speed never affects depth of field):

In fact, if you still don't understand, just memorize this: Other than it can be used to regulate amount of light entering into camera for an exposure, aperture also will affect the degree of depth of field. When combined with other essential elements that may also contribute to depth of field changes, such as focal length of the lens in use, the distance of your object in focus, you can make use of depth of field for creative control in your photography. For example: use larger aperture (Smaller number like f/2.8, f/2.0 etc.) with a long focal length to isolate or emphasis on expression, such as in portraiture photography; or use a smaller aperture (Bigger number like f/16 or f/22 etc..) to ensure pin-sharp details in both the foreground and the background.

Another factor you need to know is: All the markings on the lens barrel are double in effect . i.e. f/11 doubles the amount of light of f16, f2 allows 1X more light than of f2.8 does into the camera etc.

With a mechanical SLR camera, with the proper exposure GUIDE suggested by the built-in meter in a camera, you need to adjust both aperture and shutter speed yourself (it is termed as "MANUAL" setting in an automatic camera). Usually in the case of an automatic camera, you will still have manual control operating as if you are using a mechanical camera. Typically, a few extra choices of exposure control methods may be provided:- the first is called "Aperture Priority" (some camera uses a symbol "Av" - short for "aperture value"; the next is "Shutter Priority" (Tv - short for "Timing value". Aperture priority means you select the aperture to determine the depth of field yourself and the camera will set to the appropriate shutter speeds to match your aperture selected for a optimum exposure suggested by the camera's built-in electronic metering circuit, while shutter priority will let you select the preferred shutter speed setting and the camera will select the matching aperture values to match your choice. The third option is called the "Programmed Mode"(P - short for "Programmed Auto", where the camera select both the aperture value and the shutter speed for you and you may have no control in determine the depth of field yourself. (some cameras offer a another mode called flexi-program - I think it is too complicated to explain here).


Wednesday, February 10, 2010

INTRODUCTION

If you are interested in pursuing further in photography, understand some basic is no harm. Firstly, you need not have to go very detail into this. But there is nothing wrong in beefing up yourself with a little extra; may be this can lead you to decide whether you can generate any further interest from here. Be begin with, regardless of whether you are using an entry level P&S (point & shoot) camera, or a high-end film/digital-based SLR camera, all you need to understand what are the few elements that can help to make a theoretical perfect exposure to be formed. In this case, it is not that confusing either, because it is actually quite simple where al the essentials can be concluded as a simple equation in Exposure = Aperture + Shutter Speed. To let you easier to digest what I said, an exposure can be interpreted in bare basic form - a developed image that can make you very happy about (minus the sentimental factor), other things like brilliance of colours, good contrast, well focus etc. - it is like things that simply make a cheerful day out of you...

Well, in a public medium, to some of you who may have used to the simple click and shoot kind of operation, it may sound stupid why bothers going back to learn bare basic theories from scratch. I do understand in the world of automation, the sheer convenience, speediness and almost foolproof meter/exposure control system provided by any modern camera may always tend to lead people in thinking there is no such necessity turning back to pick up a few tricks on fundamental. While I agree to certain extend, where automation helps a great deal for photographer to concentrate more on the subject matter and usually, will help user makes less mistakes along the way, which means automation can indirectly help to generate higher yield of successful photography. But on the other hand, over-dependency on convenience from full automation can also often limit in exploring potential in individual creative expression via image capture process. Well, if your priority on photography is simply to record, hate or dislike numbers in learning equations - don't stress yourself, forget all these then. But if deep inside you feel a desire to see whether can you go one-step further from all these - TRY to digest something from this site then.

Please bear in mind, this section of my site is solely aimed to inspire what you can do with your hardware owned but not to educate. Actually, comes to think of it, this kind of lecture should be the task of the various industrial suppliers of camera and films. The whole problem is, most prefer in busy servicing existing pool of matured SLR photographers without attempting to expand their market place by inviting potentially new users into the field of serious photography. Anyway, changes occurred in the industries recently may be reflecting their priorities of each could be busy fighting for survival rather on responsibility which resulted in without bothering too much in this development effort. One way or another, I do hope each of them must also understand the market requires continuous stream of budding, new crop SLR camera users to expand the market further. Most likely, the pool can either comes from students from art colleges or individuals but an enormous number of P&S owners may hold the key for market users expansion (imagine if a successful conversion of 15-20% P&S camera users to serious photography should make another few millions new cameras to forma a new sale ). I don't intend to be a hero by pointing my remarks directly to all of them but neither I wish those industrial guys to milk Xtra $$$ from poor consumers like us without performing their duties but when you are living along with these changes in the industries, instead of dependence on others to lead the way, I would rather prefer creating a self-promotion effort via the web by creating this site.

Anyway, simple online photographic resources for beginners on the web are not too many - but you don't have to treat yourself so lowly by getting a " Photographic Basic for Dummies" kind of stuffs to learn some basics. Many years ago, I had my hard times when picked up this hobby, so more of less I can understand where the confusion is for migration from point & shoot to a little seriousness into photography. So, I would think this could have been a bus-stop where will make someone takes an easy ride, going a step further from where you are. This site is not intended to satisfy needs of the experienced ones who may be asking why content posted here is so "SIMPLE" and "BORING".. Boring ? yeah yeah .. May be. But to any seasoned photographer, in fact, the term "simplicity" in photography can mean bloody complex and difficult to reach a simple state in expression via a camera/lense. Well, for those who may think they are technically a superior elite-group of photo-bugs, If you think technically you are very sound, just let me ask you this question:- when was the last time you have used your bare minimum equipment, such as a normal 50mm standard lens, and produced a visually stunning and powerful image which can make you feel very satisfying ? Admittedly, for me, it can still difficult and I'm still struggling to remember when was the "last time I did"....so, you thought you are great huh ? So, when was your last time ? hehe ..
would think majority of us who own a camera and few lenses are not depending on photographic medium to make a living. We are here simply because of a common interest in this creative form. Regardless for leisure photography or just to record a happy, memorable moments in our life could well be the logical reason why we own a camera in the first place. In time to come, some may migrate from casual shooting to recreational hobby or even semi-pros. Everything must have a starting point, so please bears with the simplicity.
As for any entry-level photographer, the topic here can be quite confusing with all those technical terms, values and figures used. Before you begin, I would suggest you try to overcome this mental block first as they are just a term. You need not have to feel embarrassed or upset from a confusion that might be created via reading between the lines or term used here in this site. Well, as I said, I have been through similar path - a poor fella that used to struggle with all these once, felt as confused as you are now or as you may be experiencing right now. So, I have tried my best to put them in simplest form of explanation where it relates. Don't worry, my friend - my English is not too good either, so, there will be not too many out of this world kind of technical terms used here in this site, okay ? Just relax, hold your camera in your hand, have a cup of tea beside you and look for things on your camera where the pages relate.